
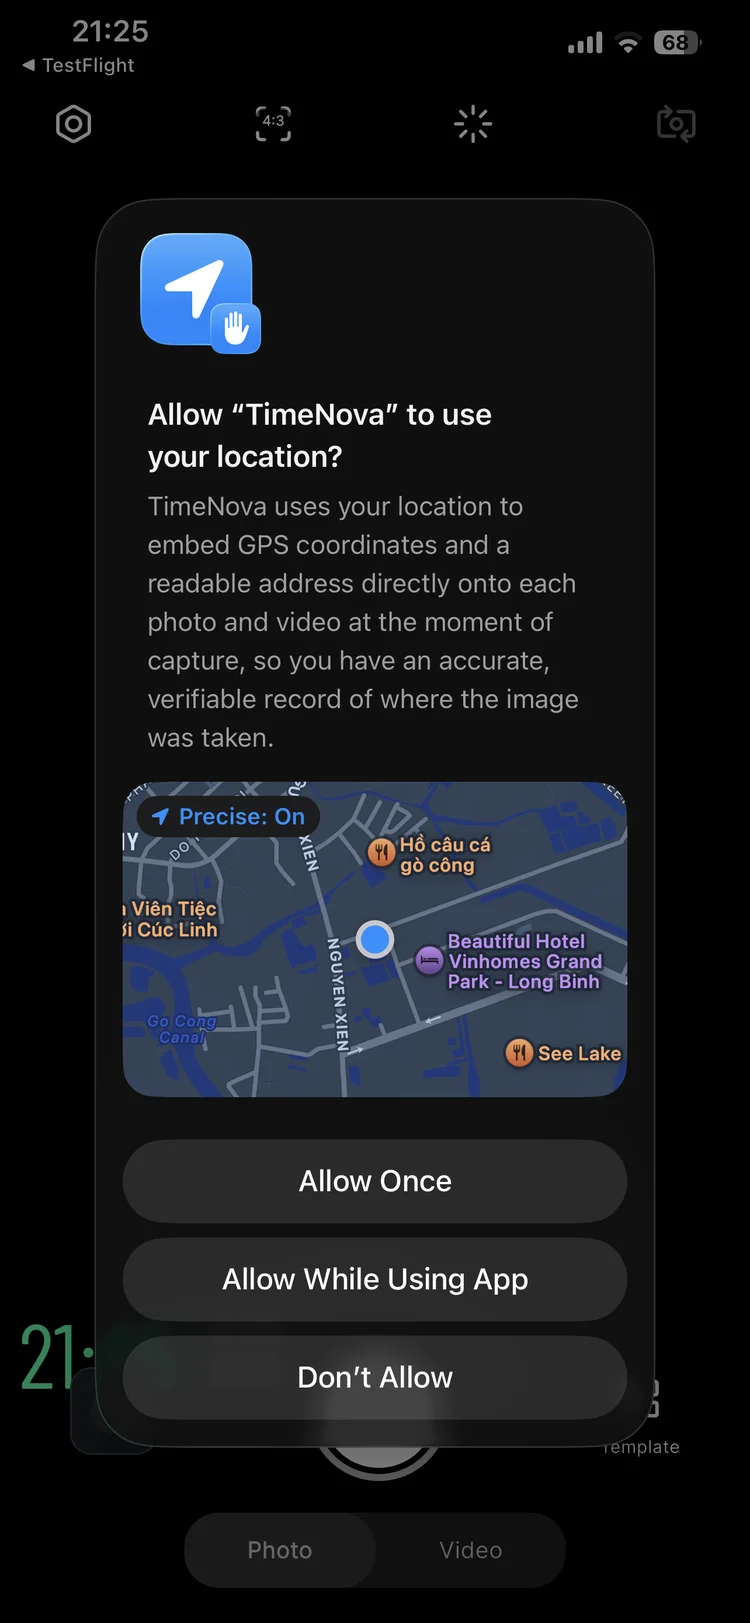
Required Permissions Setup
When opening TimeNova for the first time, grant all three permissions so the app works correctly and captures complete verification data.
iOS
Choose While Using App or Always for Location permission.
Android
Choose Allow while using the app or Allow all the time.
Without permissions, photos may still be captured but location and verification data will be missing from the watermark.
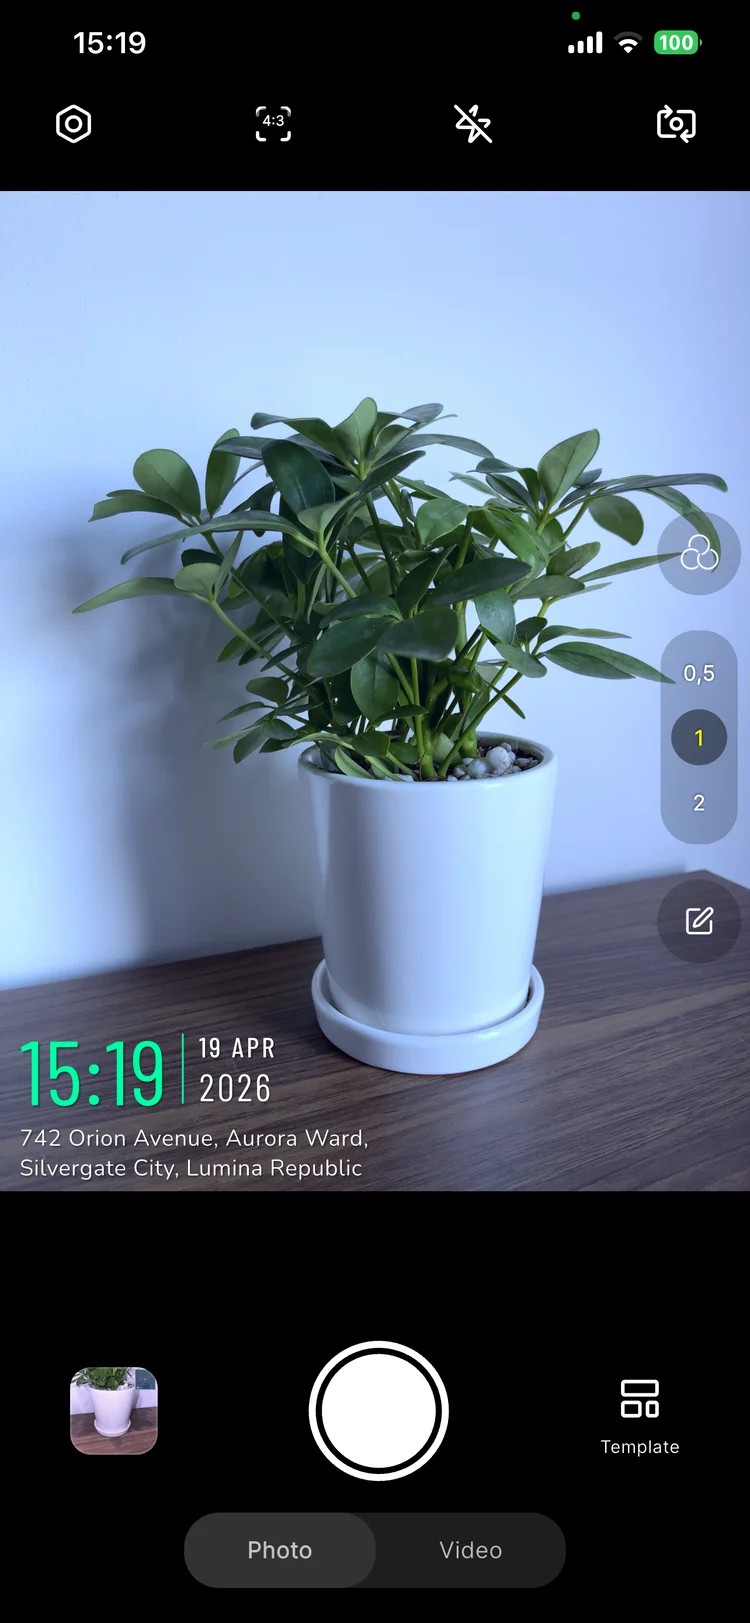
Capture a Watermarked Photo
Follow these 5 steps to shoot a photo with the full timestamp, GPS, and address watermark applied automatically.
Open the Camera tab
Tap the Camera icon in the bottom navigation bar to enter capture mode.
Choose a Template
Tap Template and select the overlay style that fits your context — work report, site inspection, or creative.
Wait for location to stabilize
Watch the location info displayed on screen. Wait until the address and coordinates appear steady before shooting.
Frame and capture
Compose your shot and press the shutter button. The watermark is baked in automatically at the moment of capture.
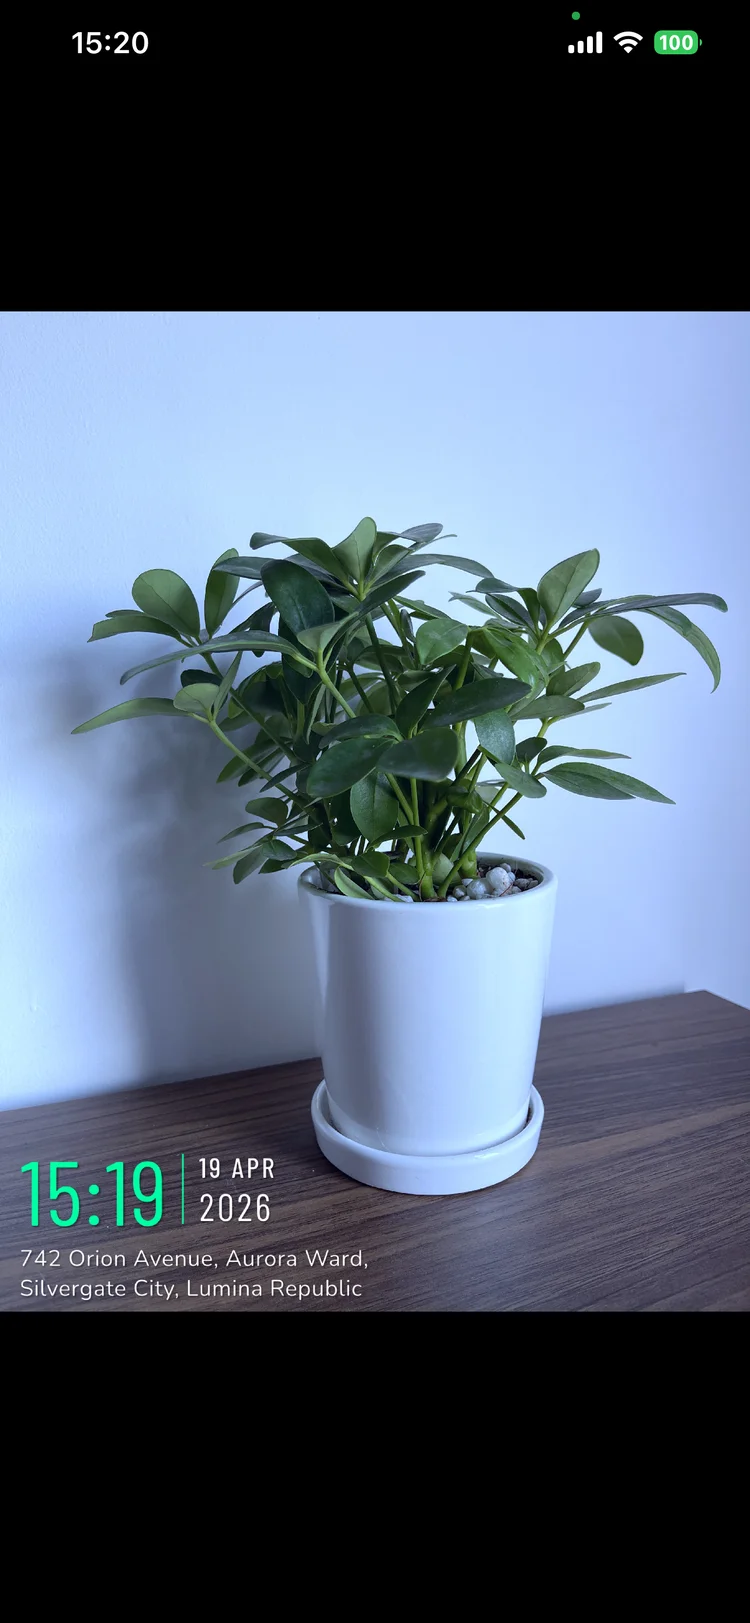
Check in My Album
Open My Album to verify the saved photo has the correct watermark and metadata.
Expected result
Record a Video with Overlay
Switch to video mode to record footage with the same live overlay — timestamp and GPS data are visible throughout the recording.
Switch to Video mode
From the Camera tab, slide or tap to switch from Photo to Video mode.
Select a template
Choose your overlay template before you start recording — templates cannot be changed mid-video.
Press Record to start
Tap the record button. The overlay will be visible on screen throughout the recording.
Monitor the duration
Watch the recording timer on screen to track how long you've been filming.
Stop and save
Tap the record button again to stop. The video is saved automatically to My Album and your device gallery.
Videos are significantly larger than photos. Clear unused videos from My Album and your device gallery periodically to keep storage free.
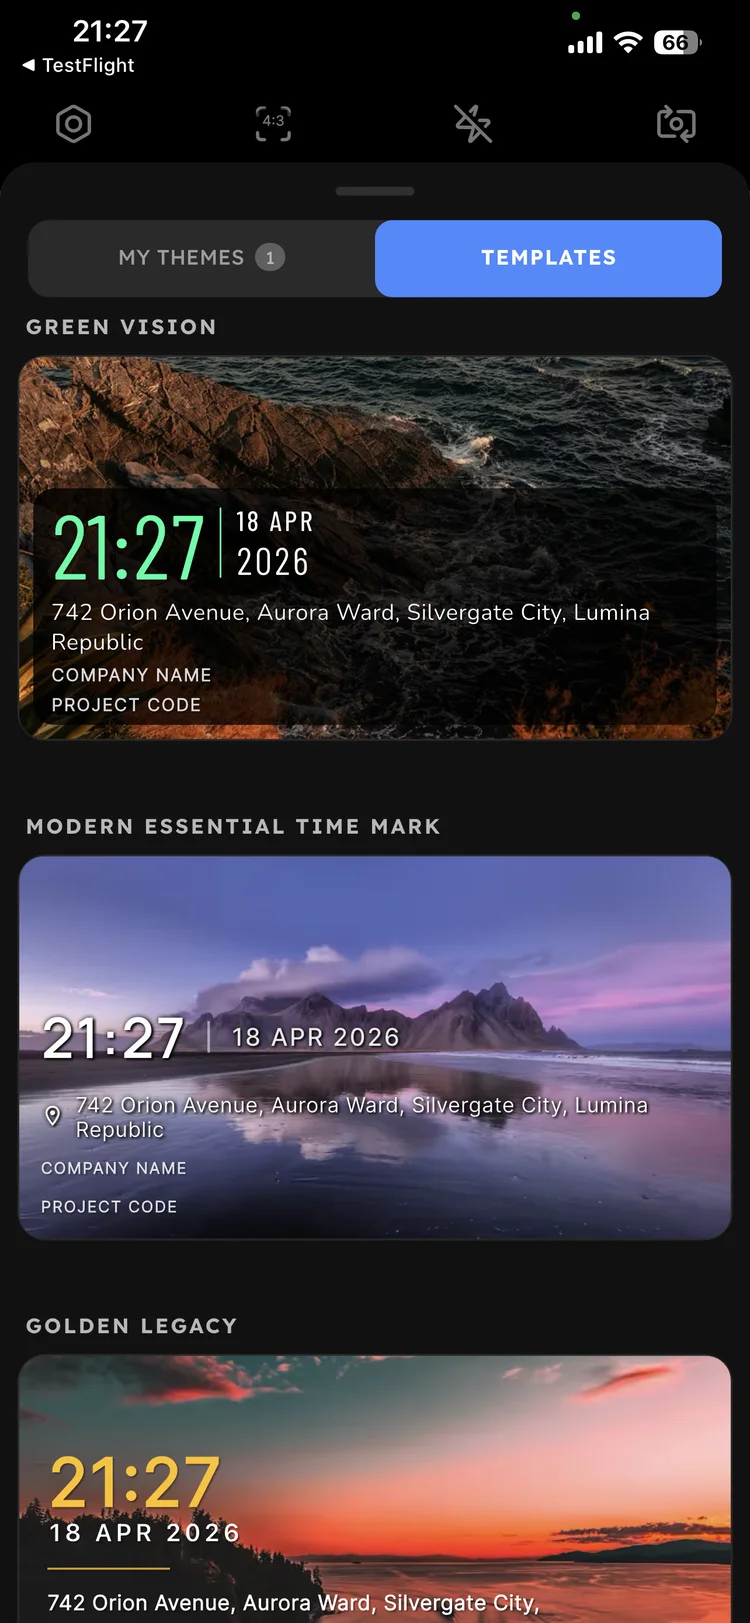
Templates & Personal Presets
TimeNova includes a variety of built-in templates for different use cases — work reports, site inspections, and creative content. You can also create your own personal presets in My Themes.
To create a personal preset:
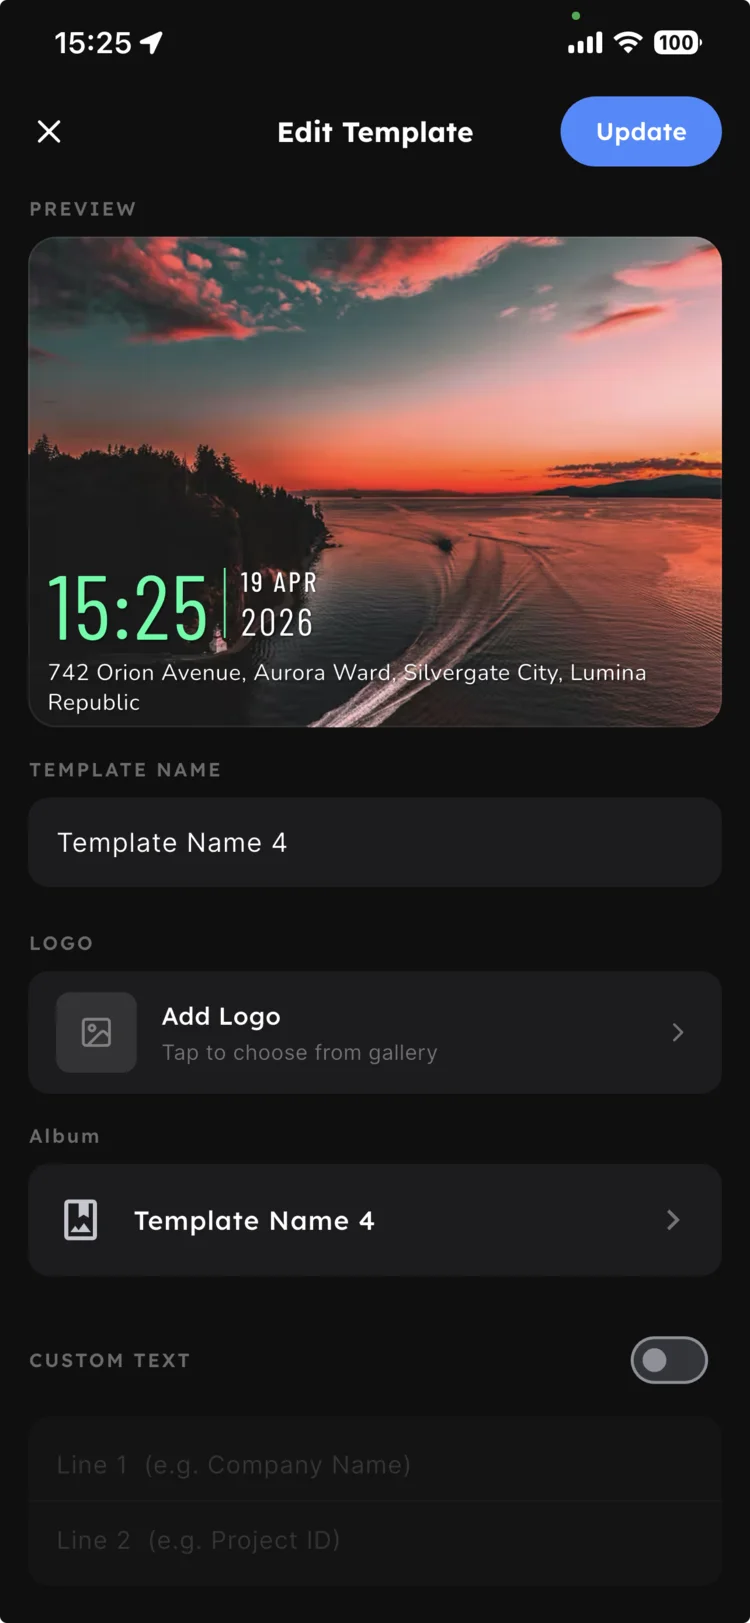
Create one preset per project or client. Switching between them takes a single tap — no reconfiguring each time.
Album Management
My Album keeps all your watermarked photos and videos organized. Use these common operations to stay on top of your media.
Organize by project, client, or work date. Name clearly for easy retrieval later.
Filter the view to show All, Photos only, or Videos only to quickly find what you need.
Long-press a photo to enter multi-select mode. Move or delete multiple items at once.
Open any photo to see embedded metadata and view the capture location on a map.
Naming convention tip
Use the format ProjectName_YYYYMMDD for album names — makes searching and sorting much easier.
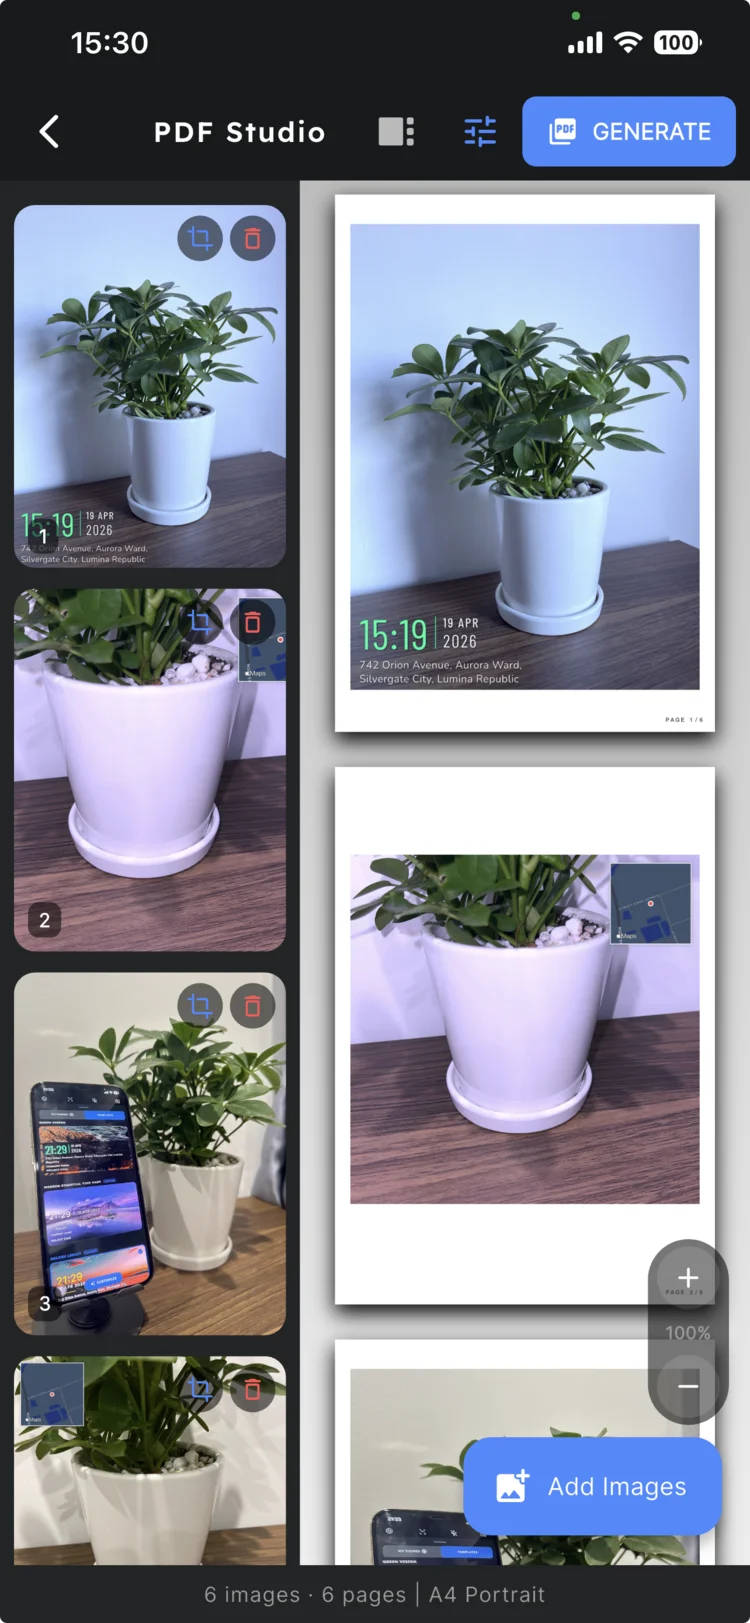
Export PDF Report
Turn any selection of watermarked photos into a polished, print-ready PDF report — no desktop software required.
Open Configure PDF and set your preferences:
Paper Size
A4 or Letter
Orientation
Portrait or Landscape
Verified Metadata
Toggle on or off
Page Numbers
Toggle on or off
Render Mode
Original · Monochrome · Vibrant
Recommended file name format
Example: SiteReport_ProjectA_2026-04-19.pdf

Recommended Settings
These default settings give you the best results for most field documentation workflows.
Watermark Display
Overlay is visible and embedded on every capture.
Auto-Save to Gallery
Photos and videos are automatically saved to your device gallery.
High Resolution
Enable when you need maximum photo quality for detailed documentation.
High Speed Shooting
Enable only when you need rapid burst captures. Turn off otherwise to conserve storage.
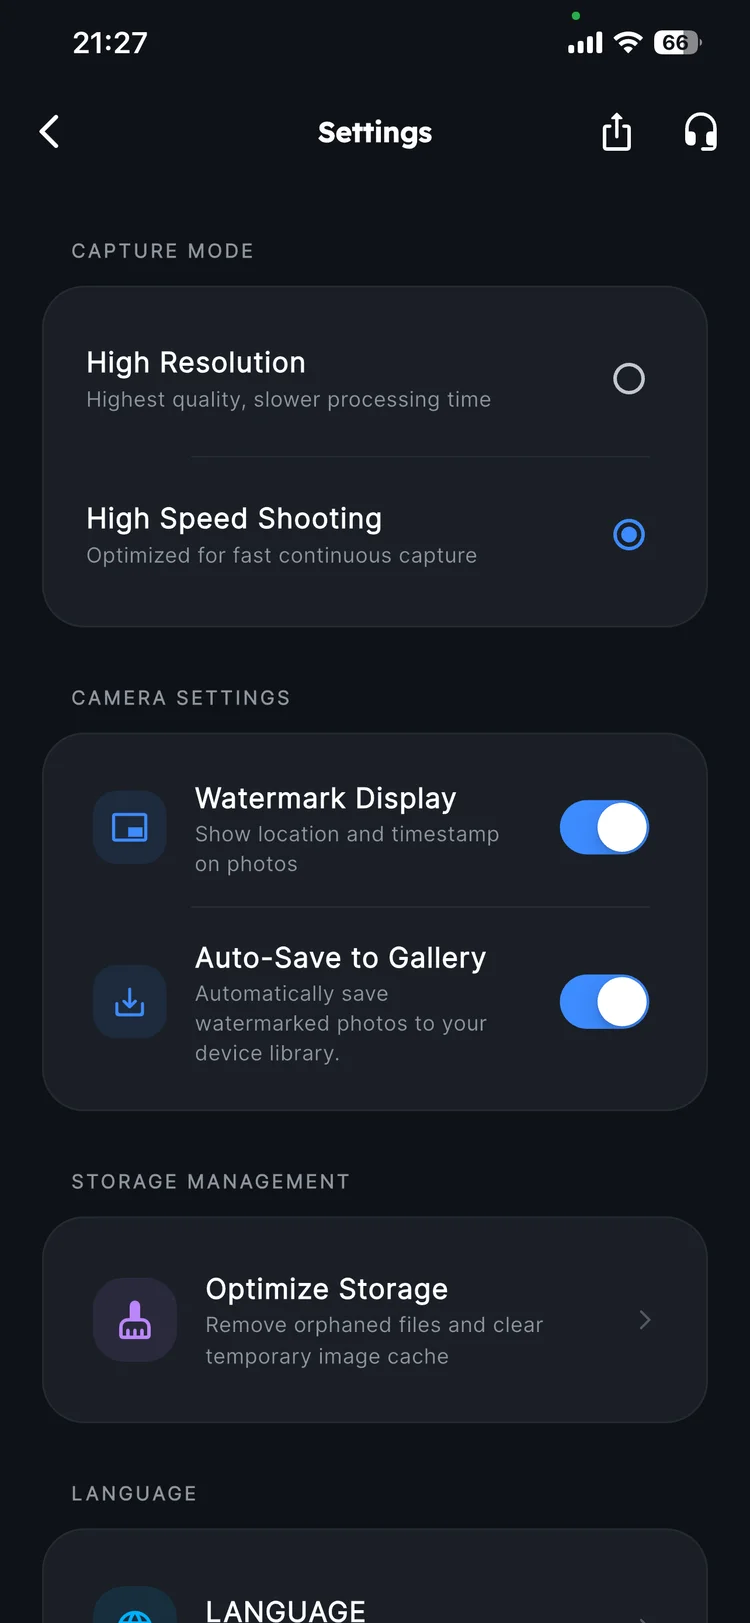
Run Optimize Storage from Settings periodically to clear temporary files and keep the app running smoothly.
Troubleshooting
Quick fixes for the most common issues.
Location not showing
Location permission not granted, or GPS signal is weak indoors.
Check Location permission in system Settings. Move to an open area and wait a few seconds for GPS to lock.
Photos have no watermark
Watermark Display setting is turned off.
Go to Settings → Watermark Display and enable it. Retake the photo.
Can't save to device
Photos/Gallery permission was not granted or was revoked.
Open your device Settings → Apps → TimeNova and re-enable the Photos or Storage permission.
PDF creation failed
Low device storage, or too many large photos selected at once.
Free up storage, reduce the number of photos in the export selection, then try again.
Pre-Report Checklist
Before sharing a PDF with a manager or client, run through this checklist to make sure everything is correct.
Photos are in the correct order
Review the sequence in PDF Studio and drag to reorder if needed.
Metadata is configured correctly
Verified Metadata and Page Numbers toggled as required by your recipient.
File name is clear and includes the date
Use a format like SiteReport_ProjectA_2026-04-19.pdf.
Preview the PDF before sharing
Open it in My Files to confirm it renders correctly before sending.
All checked? You're ready to share.
Tap the share icon in My Files to send via email, messaging, or any app.
Support
Can't find what you need in this guide? We're here to help.
© 2026 TimeNova Team · Updated April 19, 2026